Showing posts with label Frame. Show all posts

Tuesday, 16 June 2015

Clip it, Frame it

An adorable personalized picture gift for an adorable 1 year old.

 
We made a pretty picture collage for the cutest little baby - Anaya. Her aunt wanted to gift her a memorable 1st birthday gift.  So we put in all the sweet-naughty memories of little Anaya over the past one year in a clothes-line fashioned picture frame.

quirkitdesign_clip it frame it_birthday gift_DIY_quirky_home_decor_upcycle_idea_design

With the theme of a pastel carnival we created various elements and pictures that were associated to the birthday girl: from her love for dance to her use of gibberish words.

When all the elements were put together it did make a pretty collage. And with every passing year when the little one grows up, there's room to replace the old memories with new loving ones.


quirkitdesign_clip it frame it_birthday gift_DIY_quirky_home_decor_upcycle_idea_design

Sunday, 4 January 2015

Paint Dipped Artwork

Trend alert: give a modern twist to your old paintings by dipping it in paint!

Certain trends catch your eyes instantaneously, may be for the good or for the bad.

So imagine a meticulous beautiful painting and it being dipped in paint half way through! "Sigh" - Like the look of it?

This whimsical trend of dipping your artwork in paint is the latest fad.

oliverjefferspaintings_Quirk It Design_paint dipped artwork_DIY_Quirky_Home_Decor

oliverjefferspaintings_Quirk It Design_paint dipped artwork_DIY_Quirky_Home_Decor

oliverjefferspaintings_Quirk It Design_paint dipped artwork_DIY_Quirky_Home_Decor
Oliver Jeffers dipped paintings


oliverjefferspaintings_Quirk It Design_paint dipped artwork_DIY_Quirky_Home_Decor
Process details about of Oliver Jeffers here

Paint dipping chairs, cabinets or spoons has always been popular; but an entire artwork paint-dipped requires an act of courage.

oliverjefferspaintings_Quirk It Design_paint dipped artwork_DIY_Quirky_Home_Decor
DIY dipped artwork,from DIY Candy
Brit & Co DIY dipped frames - a little less obtuse
This technique is a very interesting DIY. All we need to do is take any of our old framed painting and make a horizontal, vertical or slant division on the painting. Ideally we should dip it in a tub of paint. But why waste so much precious paint? So we paint the desired area with thin paint in a vertical motion repeatedly to give a dipped feel!


Is it whimsical, or well curated or just child's play? It's worth trying out though!

Monday, 29 December 2014

Clip it, Frame it

A clip-board made of a naked frame & a clothes-line: to put up pictures, notes and messages for your loved ones.


quirk it design_clip it frame it_DIY_home_decor_quirky_upcycle_1
clip-board for my wife on our anniversary
I love my office pin-board. It makes life at work so much simpler. With all my to-dos, tasks and notes can just be pinned up, with the information being easily accessible. And once the notes are converted to action, throw them out to make space for new ones. So I thought it would be cool, if I had a similar board at home. Where I can leave love messages for my wife and my wife can write up chores for me to do. Apart from the notes, it could be used as a flash board for putting up pictures and small snippets here and there.


But for my home I wanted to make the pin-board a little less boring than the one I have on my office desk. So I thought of rather making a pin-board, I can make something more like a clip-board; where things could be clipped on and clipped off. So I got a picture frame and removed the outer glass casing of it. I took a regular jute cord and zigzagged it across the back cardboard casing of the picture frame. Made grooves on the edge of the casing so that the cord would stay in place. After all the criss-crossing the picture frame had this naked geometric abstract look.


So after the base of my clip-board was completed all I needed were a few clips to attach the notes & pictures to the so-formed cord mesh. I got these really neat small sized wooden clips which complements the other browns of my frame so very well. Finally my framed clothes-line is ready to be used. Now the only thing required is to put my notes, pictures & snippets.


We can personalize with whatever we want to. Put up messages, write down your shopping list, put pictures – and once bored of them just clip a few new ones!

Wednesday, 1 October 2014

Color Silhouettes

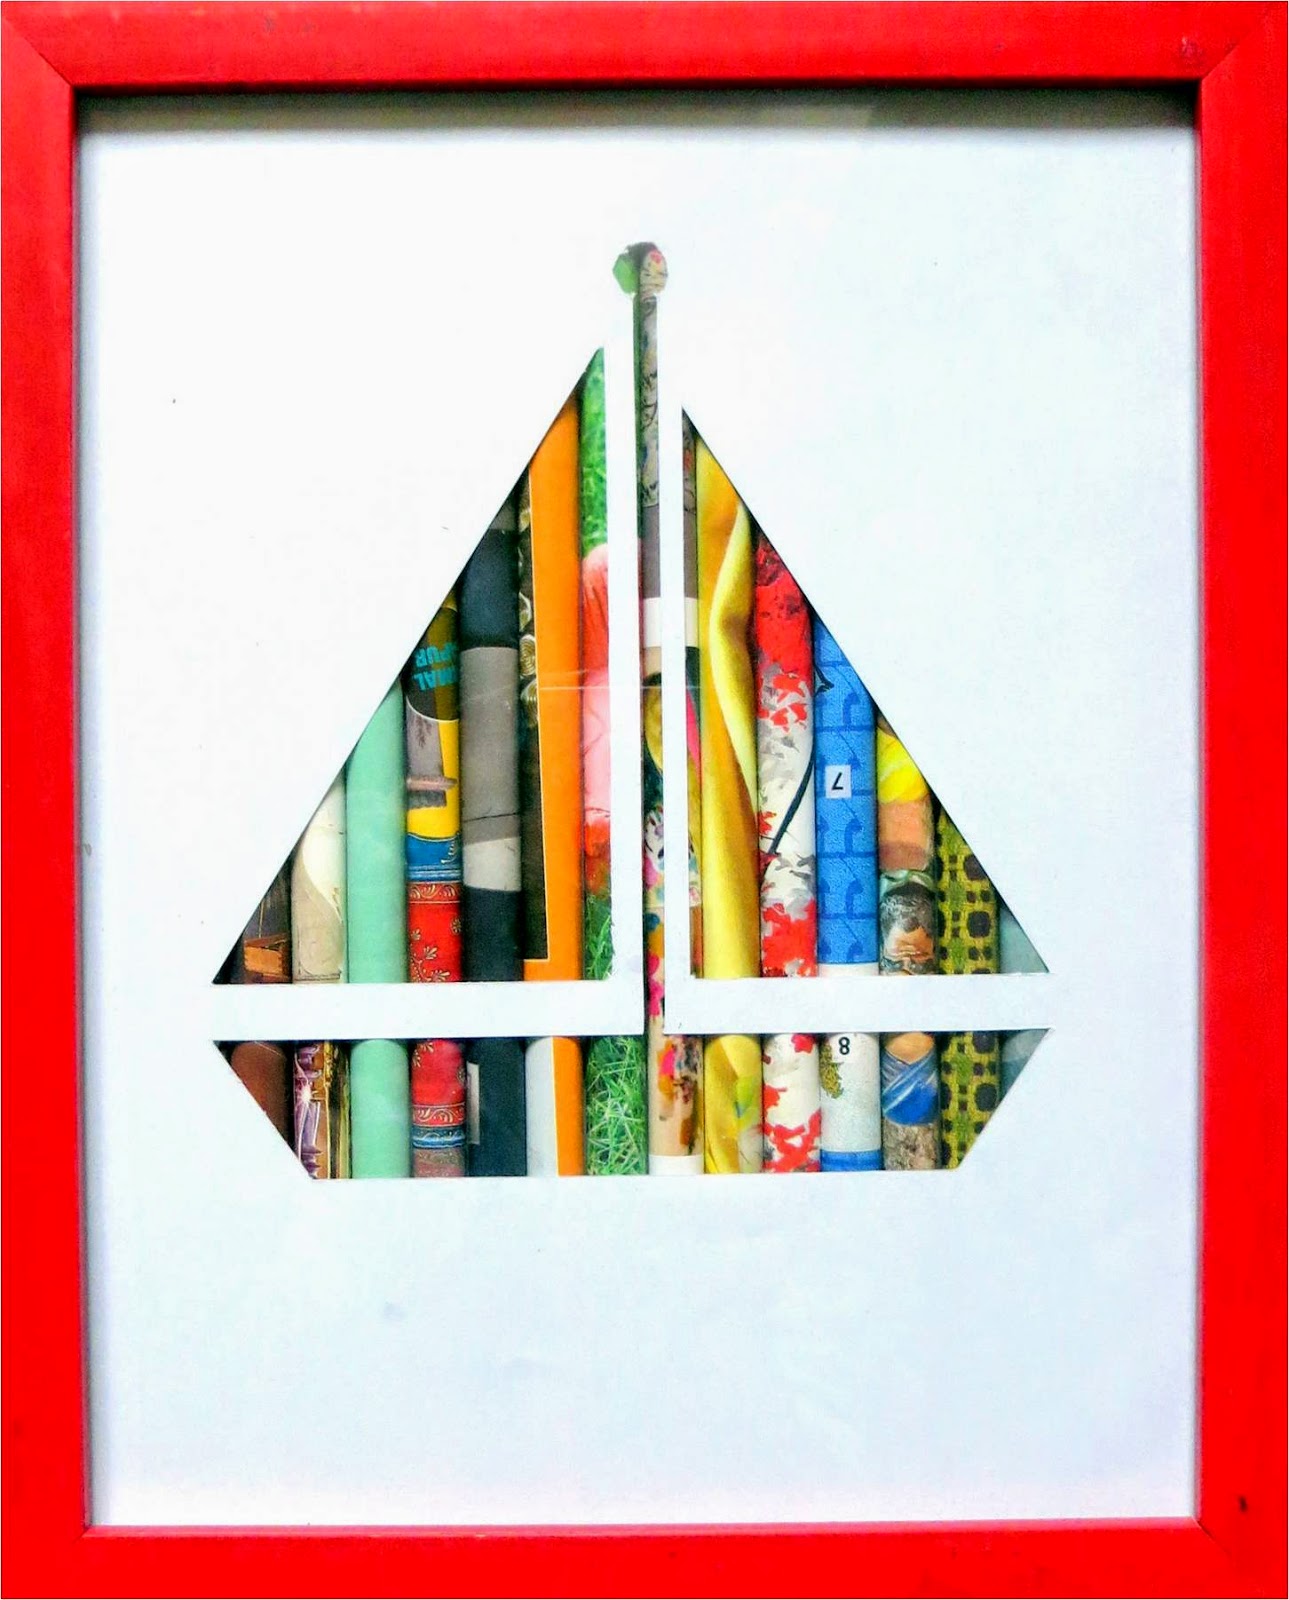
A photo-frame with magazine paper silhouettes popping out.


This is a simple DIY trick, in which with just paper, scissors and an old-frame we can make bold photo-frames that pop color and can be transformed almost every day.

The idea is to first tear out glossy magazine papers in various colors. Each paper is rolled out in a pencil thick roll and glued at the end. The magazine rolls are then cut to fit the length of an old photo frame and then stuck with as many paper rolls required to cover the breadth of the frame cover. This forms the colorful back drop of your photo-frame.

Quirk It Design_Color Silhouettes_stencil photo frame with color magazine paper background_DIY_Quirky_Home_Decor_sailQuirk It Design_Color Silhouettes_stencil photo frame with color magazine paper background_DIY_Quirky_Home_Decor_snowflake

Quirk It Design_Color Silhouettes_stencil photo frame with color magazine paper background_DIY_Quirky_Home_Decor_peacockQuirk It Design_Color Silhouettes_stencil photo frame with color magazine paper background_DIY_Quirky_Home_Decor_like

Now to add more drama with a little peek-a-booish effect, we cut out white paper in different block shapes. The shapes can be as simple as regular squares, triangle & circles or as intricate as you want it. We made designs of – a car, a peacock, a snow-flake, a like thumb & a sail. The design can be anything whatsoever. The idea is through the paper cut-outs, the background coloring paper magazine-rolls will pop out much more emphatically.

Quirk It Design_Color Silhouettes_stencil photo frame with color magazine paper background_DIY_Quirky_Home_Decor_moustache

Quirk It Design_Color Silhouettes_stencil photo frame with color magazine paper background_DIY_Quirky_Home_Decor_car

And, our color-popping, transforming silhouette photo-frames are ready. Who says transformation is a rather laborious thing to achieve?!

Quirk It Design_Color Silhouettes_stencil photo frame with color magazine paper background_DIY_Quirky_Home_Decor_collage

Use a paper cutting blade tool to cut-out internal paper designs. Work in single strokes to get better cutting results, without any indents.

Saturday, 2 August 2014

Doorway to Paris

It was a door. It is now an Eiffel-framed, clothes-hanging furniture


“In love I fell…at the Eiffel”

If Paris is the city of romance, then Eiffel is definitely the symbol of this romance. So in our next project we decided to bring in a little bit of romance.

The starting point of this make-over was a wooden, old door we found. Whose frame was intact and the wood in good condition. It had 3 horizontal partitions. The first thought was that it could be converted into something like a standing 3-storeyed picture-frame.

paris - eiffel - door - frame - DIY - quirk it design - decor - before
So the first cumbersome task was to strip of the remnant old paint (which took a good 2 days, and a good toll on our hands). Post that added 2 layers of primer base-coat. Then came the paint – a nice mint is what we settled for. So after 2 coats of the paint, the skeleton of the framed door was ready.

For framing purpose, we screwed cork boards onto the back-side. The idea was to have changeable pictures (as per our moods) which could be easily pinned. So right now we were definitely in the mood of romance - post our Paris trip and due to the lovely monsoon, if I may add ;)


 We got this lovely high resolution Eiffel tower picture in sepia colors. Bloated it up, cut it into 3 pieces, and got them printed on textured card-papers. The last step was to pin each part of the Eiffel on the 3 different sections of the door-frame.

To add another functional dimension to this door, we screwed in hooks and attached rubber supporters on the hind-side. Thus apart from it being a visual master piece in front, it renders itself to be a clothes-hanging frame from behind.  

paris - eiffel - door - frame - DIY - quirk it design - decor paris - eiffel - door - frame - DIY - quirk it design - decor

And our labor of love was thus, completed.

I love the contrast of the burnt sepia and the fresh mint color. But, what I like most is the attention the Eiffel picture commands, drawing us in, as if we were standing right there underneath it: falling in love all over again!


Soft-boards are not restricted only for schools or office. At home too they can be used. Frame the soft-board up and pin the picture you like. Easily change pictures as and when you want or as per your moods.